Riding During The Coronavirus

20181113_140301 (2)

Should you ride? Should you wear a mask? Should you ride with friends? These are just a couple of the questions you’re probably asking yourself right now.

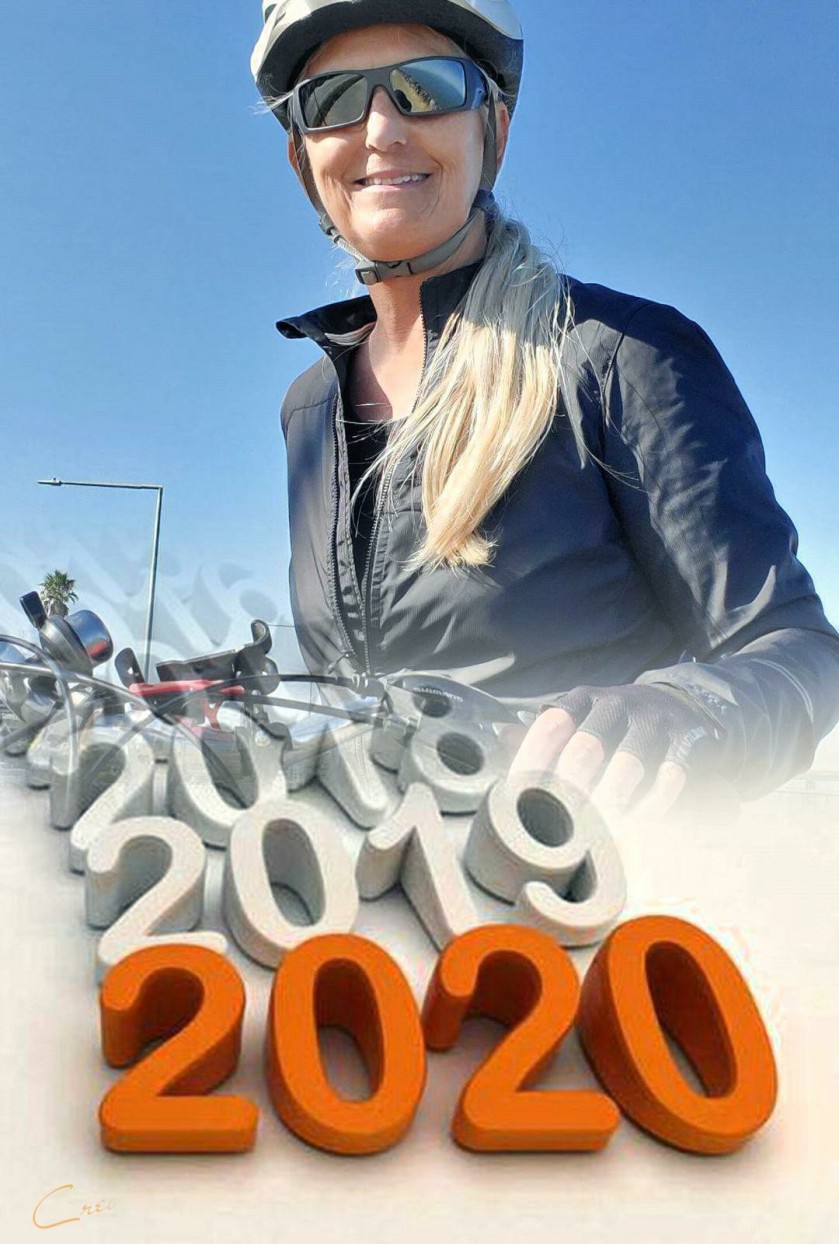
In November of 2018, we were having horrible fires in California after years of drought and to ride my bicycle I had to order and wear N95 masks. I bought a box of 20 and barely used them because the air quality improved pretty quick in my area. That’s me above riding at that time.

It was horrible to wear a mask while riding. As you can probably imagine under that mask my face was sweaty, it fogged my sunglasses, and my nose was running. I was still glad to have them at that time and now I’m glad to have the remainder since the virus showed up and you can’t find masks.

The coronavirus is making history there’s no denying it and it’s here to stay. For how long we can’t say. It’s scary and there’s a lot of fake news swirling around amongst the real news that can make your head spin. Then there’s the fact that we are sheltering in place, not allowed to see other people, and homebound while our whole lives are changing. It can drive you crazy.

I’ve been bike riding the whole time and since I’ve been riding there have been many changes. The Bay Trail where I ride went from the regulars to crowds of newcomers and their kids. These people could care less about the rules set in place for sharing the Bay Trail. It was frustrating, to say the least until the authorities stepped in. Thank heavens they did it was getting crazy and people were not distancing.

The park’s parking lots were closed, groups were limited to 10 people or less, walkways were blocked, parks were closed, and more. The Bay Trail is a very large trail that goes around the entire San Francisco Bay so there’s really no way to close it but it did limit people’s access to it somewhat.

20200401_125146

My friend Anoush (77) and I rode last Wednesday before most of the parking lots were shut down but we had a nice ride. We keep our distance from each other and other people and don’t hug after a ride like we used to.

Should I ride?

I think I read that if you exercise outside that you should distance yourself from others and keep within 5 miles of your home. If you ride with a large group that’s a no-no but riding with a friend or 2 should be fine as long as you’re careful and know who you’re riding with. So there’s nothing wrong with taking a ride during this time.

Keeping up with your exercise program (cycling) is extra important because it helps the boredom and keeps you healthy. Constant sitting all day is as bad as smoking cigarettes! Exercise also helps you sleep better at night. Maintain your health by daily exercise, eating right, and getting enough sleep.

If you don’t ride, you should think about starting. With gyms and other workout venues being closed I think we’re lucky to have something we can do at this time! Running is good but if you want low impact biking is your answer. It gives you a strong core and strengthens your legs. It promotes balance and agility. I’m 65 and bike with people in their 80’s so anyone can do it. It’s aerobic and fun.

There are a few things to think about while riding now.

  • Don’t ride behind joggers, runners or walkers for very long.
  • Keep your distance (6 ft.) from everyone unless passing.
  • When passing keep the widest berth you can.
  • Pass as quickly as you can and don’t get distracted or chat.
  • If you see someone coughing, spitting, or blowing their nose in the air avoid them at all costs.
  • If someone gets too close or is doing something you don’t like wait or take another route past them.
  • Because traffic is sparse now the street (bike lanes) are often a good bet.
  • If riding with a friend don’t share water or sit close together on breaks.
  • When pressing buttons for street crossings use the same knuckle on either hand so you don’t touch your face.
  • There are no places to stop and sit for coffee.
  • Bathrooms are now closed so make sure you go before you bike!
  • Carry hand sanitizer with you on your bike and use it during or after you get home.

Should you wear a mask?

This is the million-dollar question. I don’t wear a mask while biking but I do when I go anywhere else. Because we are alone most of the time on our bikes in the fresh air there’s nothing to worry about. It’s those times that we encounter people on the trail and have to pass that’s important. Like I said earlier masks are not comfortable but if it makes you feel better then wear one. If you don’t have one a bandana or scarf, any type of coverage is good. The virus can live in the air for a short amount of time so the choice is yours. I feel if I’m careful I can avoid catching it.

20200308_120503

Peter (59) is another friend I ride with during this virus. We also keep our distance. Peter wears a bandana over his mouth but only because he has allergies.

Riding during this time is awesome to me because I still have some freedom left. When I ride it makes me feel so good it’s hard to explain. Afterward, I feel great because I burned calories, got my ya-ya’s out, maybe saw a friend, and enjoyed the beautiful trails in the springtime. I love biking and always look forward to my rides. I can only hope they don’t crack down on getting fresh air or I’m toast.

I haven’t had the flu in a couple of years nor a cold. I’m a senior (65) and only take meds for my thyroid and have no heart problems. I’m in great health and all due to living a healthy lifestyle. I have written much about how to live a healthy lifestyle on this blog so please take the time to learn. If this isn’t the time to start I don’t know when is.

Take the time to ride while we are on lockdown. Don’t be afraid to ride with a friend you can trust not to be sick. Stay in good health. People who are healthy are more likely to stay that way and don’t get sick as much. This is a fact look it up yourself. This is a historical time of many firsts for our world and we need something to help us get by. Trust in cycling and keep the faith.

Don’t get sick. Follow the rules. Stay healthy. Stay safe. Big virtual hug!

I changed the name of this blog to Let’s Ride. I hope you’ll keep stopping by to enjoy learning about biking and health.

How To Shift Your Gears

If you’re not riding a “fixie” (a bicycle with no gears) then you need to know how to shift those gears and use them efficiently while riding. Whether you have 7, or 24 gears all it takes is a little practice to make it perfect.

Shifting your gears is one of the fundamental mechanical functions of your bike. Learning how to shift may seem basic, but gearing practice is something that even veteran riders can work on. Proper gearing will not only improve your speed it will also make the ride more comfortable and increase your endurance on longer rides.

The terminology can get tricky but here we will keep it uncomplicated. Note that for our use I’m not getting into the different kinds of bicycles only the basics of how to shift. If there’s something I don’t cover on your bike please leave a question in the comments.

How Many Gears Do I Have?

In simple terms, you could determine this number by multiplying the number of cogs in your rear gears by the number of front gears your bike has. For example, if your bike has 7 cogs (rings) in the rear and three front gears (rings) then you have a 21-speed bike. However, adult bikes are rarely referred to in this way in the modern bicycle industry because, basically, more doesn’t always mean better.

aid369151-v4-728px-Shift-Gears-on-a-Bike-Step-2.jpg - Edited

Rear (Cogs) Gears

aid369151-v4-728px-Shift-Gears-on-a-Bike-Step-1.jpg - Edited

Front Gears

There will always be more rear gears than front gears on your bicycle. On three-speed bikes, the gears are inside the hub of the wheel so you don’t see them.

What Hand Does What?

Left hand: Controls the front gears/front derailleur by moving the chain up and down the chainrings. These levers cause big jumps in gears for sudden changes in terrain.

Right hand: Controls the rear gears/rear derailleur by moving the chain up and down the cogs. These levers are for small adjustments to your gearing to use during slight changes in terrain.

20190215_121307.jpg

My bike is a hybrid with 24 gears. The right side controls the rear gears (8) and the left side controls the front gears (3). It’s important to note on the right, the lever on the bottom of my handlebars is low and the one in front (under my brake lever) is high.

Depending on the type of bike you have your shifters may look a little different. On road bikes (any bike with drop handlebars), your shifters are the same levers you use to apply your brakes. To operate the shifters you push the lever sideways until you hear a click. For most mountain and hybrid style bikes with flat or curved bars, you shift the gears by using set paddles that you operate with your thumb. Some bikes operate with “grip shifters”, or a dial that is located to the inside of where you place your hands. For these systems, you change gears by rotating the dial forward and back.

No matter the differences, shifting mechanics are basically the same.

How To Shift

First gear is a low gear and twenty-first gear is a high gear. Downshifting means going to a lower gear, and upshifting means going to a higher gear. You can also say shift down and shift up.

Begin to shift into easier gears with your right hand early to keep a steady cadence. Remember, your right hand is for small changes in the terrain. If you find that your pedaling pace is slowing drastically, you will likely need to use the front derailleur (your left hand) to make the gearing much easier for the big climb ahead. But if you are already climbing up the hill and putting a ton of power down on the pedals you might notice your front derailleur doesn’t want to work. You will shift, hear a grinding noise but nothing will happen and you will likely come to a stop in the middle of the hill.

Instead of grinding those gears, you will need to put a little more power into your pedal stroke right before your shift then, lighten up on your pedal stroke as you shift. With less pressure on your chain, your derailleur will have an easier time popping your chain off the big ring and into a smaller one.

If you completely stop pedaling you won’t be able to shift at all!

Too often, I see people putting too much power into their pedals as they climb up a steep hill or legs flailing as they spin out on a gear that is too easy for the descent they are riding. Your goal while riding should be to keep a consistent speed throughout your ride. To do that, it requires one of two things: shifting or increased power output through peddling.

Shift Often For Increased Efficiency

When I ride, I watch the terrain and shift appropriately. Before I start up a hill or if I’m coming to a stop I will downshift ahead of time. That way I don’t worry about grinding gears when I go up a big hill or starting off in a harder (higher) gear after stopping.

When the riding is a little too easy that’s the time to shift into a higher gear. A higher gear will be harder to pedal but will take you farther at a faster rate.

If you want a more aerobic workout on flats shift into the next highest gear (making it a little harder, but not too hard, to pedal.) Downshift if you get too tired. Be careful to avoid hurting your joints (knees) so if it’s too hard don’t do it.

Shifting Basics Review

20200112_123137

 Low and high shifting levers circled for one side of this hybrid bicycle. Your bicycle might be different so identity your types of levers, dials, etc. before practicing shifting on your bike.

  • Use your left hand to shift the front gears.
  • Use your right hand to shift the rear gears. This hand gets the most use.
  • Gear down to make your pedaling easier but less powerful.
  • Gear up to make your pedaling harder but more powerful.
  • Practice shifting up and down in a flat area.
  • Only shift while you’re pedaling forward.
  • Pick a low gear when you start off.
  • Gradually gear up as you build up speed.
  • Shift down for hills and stops.
  • Shift up when on fairly level ground and for downhill areas.
  • Shift up carefully to avoid hurting your joints.
  • Avoid choosing gears that “crisscross” the chain. (Example: the front gear on the largest gear and the rear gear on the smallest gear.)

Everyone is a little different when it comes to how you ride your bicycle. The better you know your bike the better rider you become. Practice being at one with your bike and enjoy the ride!

A Word About Your Brakes

Brakes aren’t used when shifting but it’s important to know where yours are and how to use them. The right side is your rear brake lever that stops the rear wheel and the left side is your front brake lever that stops the front wheel. The most important thing to remember is to always use the rear brake first! With time you’ll learn to use both brakes together. You have to use both brakes to make stopping fast and safe.

My sister-in-law who knew how to ride her bike broke her jaw in three places when she forgot this important fact during a group ride flying over the handlebars after applying her left, front brake without the other. If you accidentally use your front brake while stopping you stop only your front wheel probably hurting yourself.

When I’m stopped I’ll also use my brakes to steady my bike when I’m getting on, etc. Your brakes are your friend.

Some Last Words

When you’re busy riding you should be watching the road in front of you for traffic, people, animals, car doors opening, street lights, debris, hills, and more. If you’re like me you’ll be looking at everything except those things. No worries because with practice and good habits, you’ll be handling it all without breaking a sweat (unless you mean to sweat.)

Sources: Drawings from WikiHow.
Some facts from Google searches.
Featured Image: The shifters and handlebars on my Norco, Rideau.

Be careful out there. Know your bicycle and your riding trails. Use hand signals. Be and stay safe.

2020-Another Year To Ride

There’s so much to look forward to in the new year! While many people are thinking of resolutions they usually break within the first few months I’m thinking about continuing what’s worked for me almost 4 years now. After putting the hustle and bustle of the holidays behind me it’s time to get back to riding.

c5859168-f086-485e-8bd4-cbb2d773efc5

Whether you ride year-round or in the spring when the snow melts one thing you should do each year is to make sure your bicycle is in tip-top shape to ride. Parts can shake loose and bikes should be inspected and readjusted yearly especially if you ride daily. Yearly bike maintenance is imperative for safe riding.

happy-new-year-bicycle-wheel-christmas-trees-snowflakes-background-creative-design-pattern-greeting-card-banner-163914225 (1)

Yesterday I had a sobering reality while doing my visual check before a ride. I checked the front and back wheel levers for my quick release and everything looked good. I usually make sure they’re flipped down tight but I don’t physically manipulate them unless they look like they moved.

Right before we took off I noticed while jerking my handlebars (by accident) that something sounded loose. I first thought it was my cell phone holder on my handlebars because I was having trouble tightening it down. It wasn’t.

I shook it again and thought I saw my front tire move. No way! I picked up my front end and spun the tire, it was moving fine. Then I pushed the wheel sideways and noticed it was moving back and forth a tiny bit. OMG!

Although everything looked good I knew something was wrong. I tried the wheel release and it was very loose. I had a vision of happily riding along watching my front wheel come off and crashing violently. It was my worst nightmare!

I released the wheel fully, tightened the release screw, and put the wheel back on. I made sure the wheel was solid and the release screw was as tight as I could work it. I also checked the rear release which was good. I had saved myself from a world of hurt and a terrible accident.

This is one reason I’m against quick-release wheels! Yes, it’s nice to get the wheel off easily for many reasons but if they aren’t tight your wheel can come off. Some bikes have a guard in place so if it accidentally opens your wheel is held on but it’s no guarantee.

I don’t wish to scare you but I rode with a friend some months ago who thought he was having a front brake problem until he discovered the wheel release had come open. He rode like that for miles and was extremely lucky his wheel didn’t come off. People don’t usually have that kind of dumb luck.

Now, most new bikes come with quick-release wheels (front and back) so it’s very important to do a visual hands-on check of your bicycle every time you take a ride. Safety first!

New-Years-Bike_910747768

What To Check Before A Ride

Take the time to look at your bike before a ride. You will want to put your hands on it.

  • Check tire pressure and add air if needed. The correct pressure will be on your tires.
  • Check the frame for any damage or rust and cables for any bends, or frayed edges.
  • Try your brake handles and make sure your breaks are engaging. The brake pads or discs shouldn’t be worn.
  • Make sure your tires have good tread on them with no aging rubber or cracks in the sidewalls.
  • Manually check your front and back wheel release levers making sure they are tight and flipped shut.
  • Check the condition of your chain. Chains need to be kept clean and lubricated.
  • Keep your (rear wheel) gears clear and clean of debris.
  • Is your seat the correct height? Your leg on the lowest pedal should be fully extended with a slight bend in your knee.
  • Handlebars should be straight and tight.
  • Secure any gear properly and keep away from your spokes.
  • If wearing pants use clips or straps to keep them tight at the ankles and away from your spokes.

If you find something you can’t fix do a search for a good bike shop in your area. They will be glad to answer any questions you might have. They can tell you how much air should be in your tires (if you can’t find it) and can do yearly maintenance on your bicycle if you can’t do it yourself. A good bike shop is the best tool you can have.

giphy (7)

Yearly Bike Maintanence Musts

  • Inspect and adjust your derailer.
  • Inspect and adjust your brakes and brake system.
  • Inspect and adjust your chain and drive system.
  • Clean and lubricate your chain and drive system.
  • Clean and inspect your frame for wear and rust.
  • Inspect and tighten screws and parts on your frame.
  • Check tires for loose or bent spokes, worn bearings, etc.
  • Inspect tire rubber for wear.
  • Inspect all cables, cable housings, and connections.
  • Inspect handlebars, hand grips or handlebar tape, mounted brake handles, and shift levers.
  • Inspect fender clearance and hardware.

If you take your bike into a shop they will do all of this for you including cleaning your bike. Ask your shop for a list of what they charge for maintenance, cleaning, and services.

c922b319-5297-421a-8e8a-777d028851f8

I’m excited to have my 4 year riding anniversary coming up on Feb. 20th! Although I’ve had a bicycle my whole life I’ve only spent the last 4 years being serious about it. I started riding 20-30 miles every other day for my health and sanity. I was 60 pounds overweight and depressed on meds in very bad health after having the worst 4 years of my life. Bike riding is now a healthy habit that has kept my weight off and helped me to get over my sleeping problems. That’s what made me do this site I wanted to spread the word about how healthy bike riding is for people of all ages. (Read my full story HERE.)

giphy (8)

Whether you believe in resolutions or not I hope this is the year you decide to get healthy and stay that way. I’d like to encourage you to consider riding a bicycle if you don’t already. It’s low-impact, gives you a strong core, a healthy heart, promotes good sleep, improves your balance and is so much fun! It makes me feel like a kid again.

On Bike With Bekkie, I have many articles that talk about the benefits of riding a bicycle and getting healthy.  How important it is to eat right. What happens when you ride a bicycle and more. I have lovely photographs I’ve taken while riding the Bay Trail. Having trouble sleeping? I got you!

The Bay Trail is a mostly paved trail that runs around the San Francisco Bay with a view of the city, the SFO airport, and many other gorgeous landmarks. The beauty of this area can’t be beaten with its marshes, man-made waterways, and the creatures that live here. Click HERE to see the map.

41-PvDrEcQL._SX258_BO1,204,203,200_

I wish you good health and happiness in 2020!